au Starlink Direct
Introduction
Recent smartphones have been equipped with satellite communication functions for emergencies. In addition to the usual wireless LAN, Bluetooth, cellular, and GNSS (Global Navigation Satellite System) radio modems, they also have satellite modems capable of two-way communication, which is quite impressive.
Furthermore, satellite emergency services using the LTE (Long Term Evolution) cellular frequency band have also begun, making it possible for even conventional smartphones to communicate via satellite in emergencies.
These satellites orbit in low orbits of around 350 to 650 kilometers above the Earth in order to capture radio waves from small devices, so their coverage area is limited compared to geostationary orbit satellites. This means that the amount of time a single satellite can be used continuously is shorter. I am very interested in how far we can take advantage of two-way satellite communications with such small devices.
Here, I tried out the satellite emergency service au Starlink Direct, which uses the cellular frequency band (LTE band 1, 2-GHz band, 5-MHz bandwidth) and was launched in Japan in May 2025. Furthermore, from September 1st, the au Starlink Direct+ plan (Plus plan) was launched, which allows use of 5G in addition to LTE under normal conditions and enables data communication for some apps via satellite.
Sign-up of au Starlink Direct
au Starlink Direct is SpaceX’s Starlink Direct to Cell service, offered in Japan by KDDI. au is KDDI’s service brand.
Apparently, if you’re already using an au network, you can continue to use au Starlink Direct. Since I’ve been using another company’s network, I installed the au Starlink Direct plan in an available eSIM slot on my smartphone.
This contract allows you to use LTE within au’s LTE service area, and Starlink Direct to Cell in other areas of Japan.
To sign up for the Starlink Direct plan, you’ll need a compatible smartphone, a credit card, a My Number card (Japanese ID card), an email address, a PIN, and a Wi-Fi connection. I used a compatible Apple iPhone 16e as my test smartphone. A new service contract can be completed through the smartphone’s browser. A Wi-Fi connection is also possible. Electronic identity verification (eKYC: electric know your customer) requires scanning your My Number card and taking a selfie with your smartphone camera. You’ll set an ID and password during the sign-up process, and your ID will be your current mobile phone number.
I experienced some trouble during the sign-up process, such as not being able to input text, but by overcoming the challenges by using copy and paste in Notepad, I was able to see a bright future awaiting me.
My contract included a six-month monthly fee waiver period, so I can use Starlink Direct for free until the end of November. The current Plus plan also includes a three-month monthly fee waiver period.
Starlink Direct, a Japanese contract, cannot be used overseas
The day after signing the contract, I tried turning on my smartphone at Hong Kong airport, but it wouldn’t connect to au Starlink Direct.
When the Starlink Direct to Cell satellite is in the sky above Japan, it is licensed by KDDI and operates as a KDDI satellite base station, providing the au Starlink Direct service. Naturally, this service is not available in Hong Kong, but I was hoping that it would be available for a short time.
My First Starlink Direct connection
In Japan, au LTE is available in most places, so it can be quite difficult to use au Starlink Direct.
The other day, I visited Iwami Ginzan, the first World Heritage Site registered in 2007 in Asia, and I finally got to experience an au Starlink Direct connection. This is the entrance to the mine tunnels called Ryugenji Mabu.

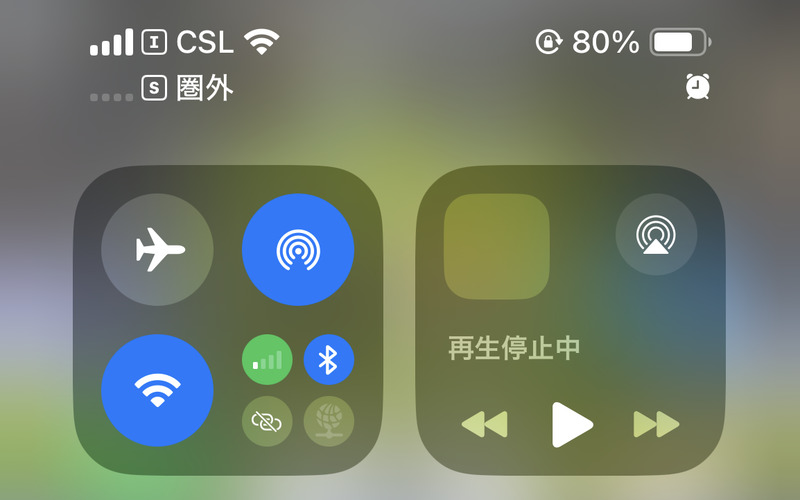
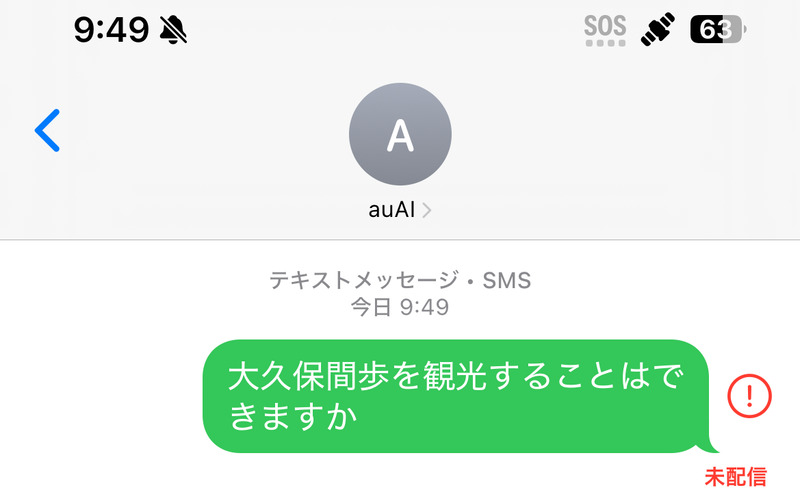
At the exit of Ryugenji Mabu, I lost LTE signal and the “SOS mark” and “satellite mark” appeared on my smartphone, indicating satellite use. I was excited and immediately tried to send a message to the AI, but at this point my device was not connected to the Starlink Direct to Cell satellite.
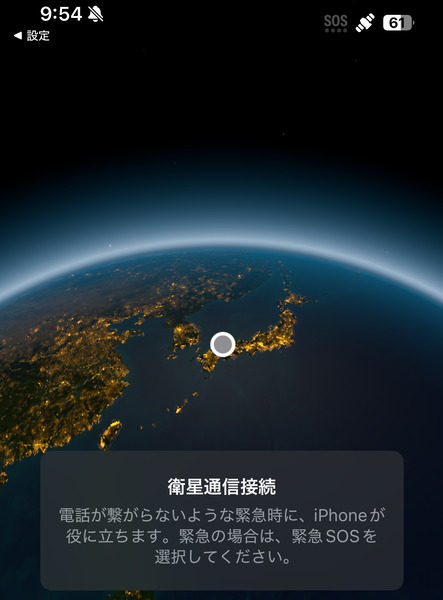
I checked the satellite connection page in my smartphone settings screen and saw that I wasn’t connected to the satellite yet.
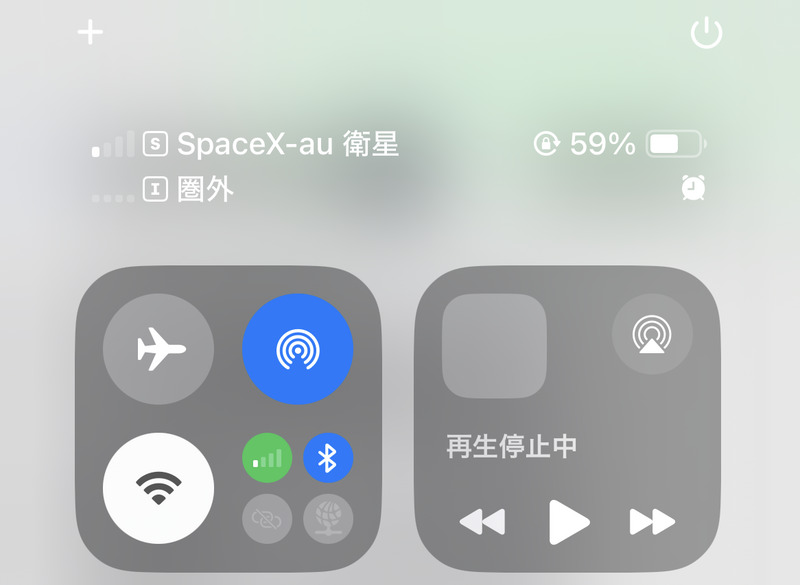
After waiting for a while, the “SOS mark” disappeared and instead the word “Satellite” and a signal strength icon were displayed. The globe at the bottom of the screen displayed my approximate location and the name of my carrier, KDDI.
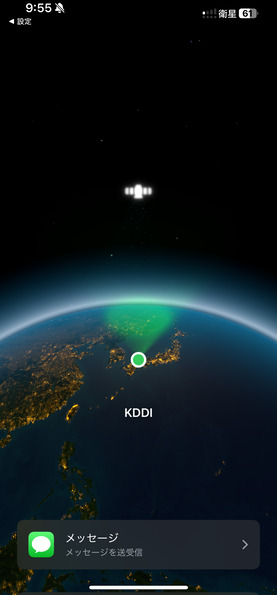
The words “SpaceX-au Satellite” are also displayed on the settings screen of my smartphone. I usually set my data communication to use a different SIM card, but here I need to change the settings to use the au Starlink Direct SIM card.
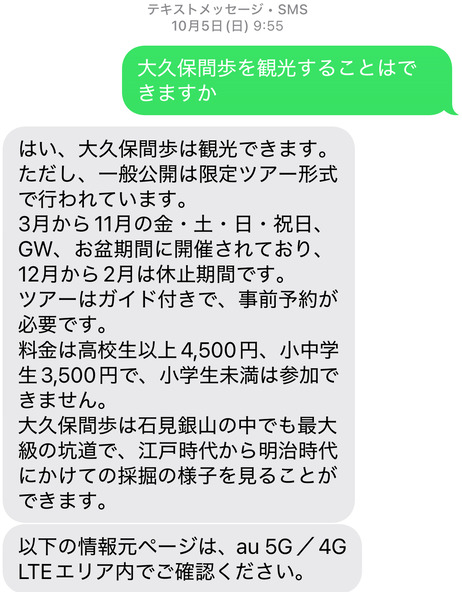
I was also able to exchange messages with the AI via the au Starlink Direct satellite.
Emergency SOS included with the iPhone
The new Apple iPhone smartphone comes with a satellite connection service that can be used for two years from activation. This is separate from Starlink Direct to Cell and uses the Globalstar satellite. It uses the 1.6 GHz band.
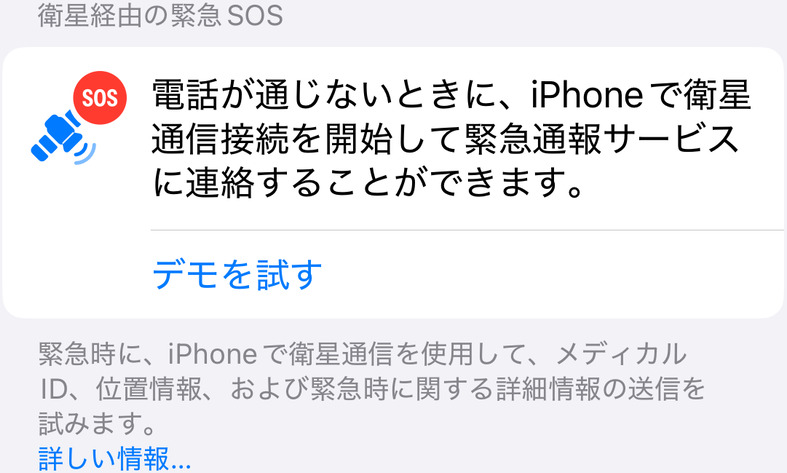
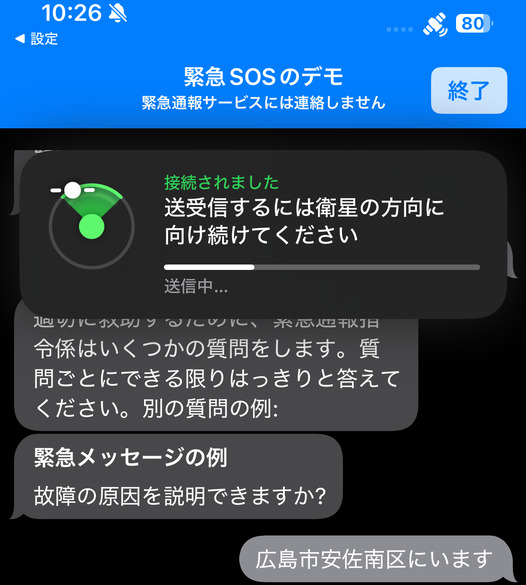
There is also an Emergency SOS demonstration function. This instructs you to point your device in the direction of the satellite. This direction instruction changes slightly over time, giving you the feeling that you are using low-orbit satellites.
Apparently, no messages will be sent from your smartphone during this demonstration.
Transferring eSIM between devices
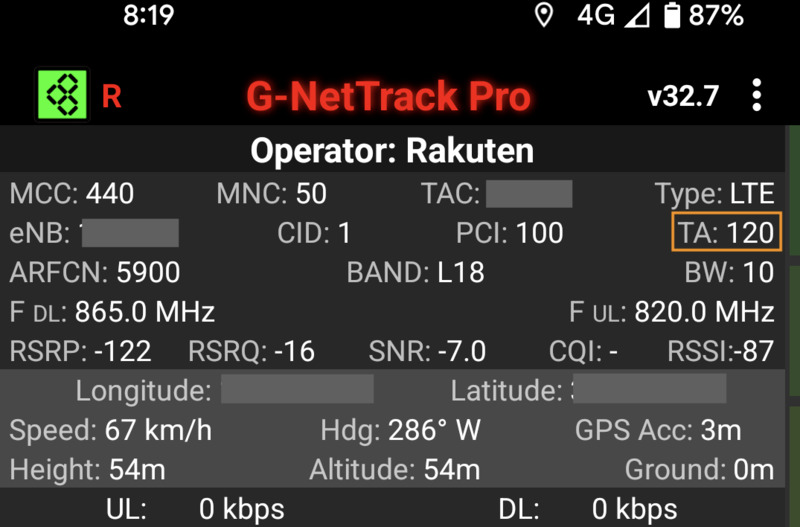
I wanted to know what the LTE TA (timing advance) value would be when connecting to au Starlink Direct. TA is a value that controls the device’s transmission timing by the propagation delay for devices far from the base station. For a TA value of 1, the device advances its transmission timing by 0.52 microseconds (equivalent to a propagation delay of approximately 150 meters).
I was eager to see the TA value for satellite LTE base stations, which are much farther away than standard LTE base stations.
On my iPhone, I was unable to observe the TA value even when using the “Field Test Mode” phone app. Android devices, on the other hand, have apps that display more detailed connection status, including the TA value. I have experienced an environment where the TA value was around 120 when using a separate LTE line on an Android device.
So I decided to purchase a used Android device that supports au Starlink Direct and transfer the au Starlink Direct eSIM from my iPhone to this Android device.
If you install the official au smartphone app (My au) on both devices and follow the instructions, you can transfer the eSIM between devices by following steps:
- On your old device, turn off all other carriers’ networks and Wi-Fi, then connect to the au network.
- On your new device, connect to Wi-Fi,
- On your old device connected to the au network, set “Turn off two-step authentication for 10 minutes” on a specific webpage, and during that time, download the eSIM using the official app on your new device.
This specific page is linked from within the official app and can only be viewed on an au network. I was unaware of this third step and spent a lot of time trying to figure it out. This two-step authentication is linked to the official app’s permission to log in via Wi-Fi. I should have noted that unless I disabled two-step authentication, I would not be able to log in to the app from a new device with Wi-Fi settings.
Conclusion
We live in a very prosperous age, with emergency satellite communication functions now available via smartphones. I hope to continue enjoying this wonderful technology, without leaving traces of the efforts of many people as a black box.
Related article(s):
- Starlink Mini 10th April 2025
- Starlink Roam 50GB Plan 4th February 2025
- Starlink bypass mode 30th November 2023
- Starlink connection in an open environment 28th February 2023
- Starlink Ethernet adapter 15th February 2023
- I became a Starlink user 11st February 2023