galmon, the GNSS navigation message aggregation software
Introduction
I used an aggregated stream of navigation messages received by volunteers around the world when observing OSNMA (open signal navigation message authentication) on the Galileo navigation satellite.
I wanted to try OSNMA on my u-blox ZED-F9P receiver, so I installed this aggregation software galmon (Galileo monitoring). galmon runs on Linux (including Raspberry Pi Zero), OSX and OpenBSD. There is also a Docker container version. The compatible receivers are u-blox and Septentrio ones, but NTRIP streams can also be accepted by galmon.
galmon includes the name of Galileo, but it can handle not only Galileo, but also GPS (Global Positioning System), GLONASS, BeiDou, and SBAS (Satellite Based Augmentation System).
PC configuration
The PCs used here were
- Raspberry Pi 3 Model B for observation (with with u-blox ZED-F9P receiver)
- PC for data collection (Linux virtual machine, saving observation data to local disk)
- Mac mini for data processing (running such as galileo-osnma)
They were connected to the Internet. It was also possible to run them all on a Raspberry Pi. However, I wanted to avoid frequent reading and writing to the Raspberry Pi’s storage, and I wanted to process data on a familiar PC, so I chose this configuration.
I would like to feed the data collected here to galmon.eu in the future.
Install galmon on Raspberry Pi for observation
I followed galmon’s README.md to install the necessary libraries and compile the source code.
apt install protobuf-compiler libh2o-dev libcurl4-openssl-dev libssl-dev libprotobuf-dev libh2o-evloop-dev libwslay-dev libncurses5-dev libeigen3-dev libzstd-dev g++
I compiled the source code on another Raspberry Pi, transferred only the binary file and ran it. Then I encountered an error that the library is missing when linking, so we need either to modify the Makefile to add a static library option when creating an executable file, or to install it on the Raspberry Pi that runs the library file whose name starts with lib.
Then download the source code and compile it. This compilation can take quite some time.
git clone https://github.com/berthubert/galmon --recursive
cd galmon
make
The device name to access my u-blox ZED-F9P (USB connection) is /dev/ttySF9P (which stands for the my secondary ZED-F9P receiver), and the IP address of the data collection PC is 192.168.0.1 (this is an example and it is different from the real one), so I ran the following command:
./ubxtool --wait --port /dev/ttySF9P -b 115200 --galileo --gps --glonass --beidou --sbas --station 255 --destination 192.168.0.1 > /dev/null 2>&1 &
By default, packets are sent to TCP/IP port number 29603 on the data collection PC. Starting ubxtool required the -b option to indicate the baud rate setting. Here, --station represents the ID that is set to 255, but we need to get the ID when feeding to galmon.eu. A lot of messages are displayed when executing ubxtool, so I suppress the display of them.
Installing galmon on the data collection PC
I installed the necessary libraries, downloaded the source code, and compiled it, just like I did for the observation Raspberry Pi.
Then, navrecv saves packets from the observation Raspberry Pi to the local disk (directory name is ./galmon), and navnexus makes the saved data available from the network.
./navrecv -b :: -s ./galmon > /dev/null 2>&1 &
./navnexus -b :: -s ./galmon > /dev/null 2>&1 &
Now we can get the collected data by accessing TCP/IP port 29601 on this PC.
nc 192.168.0.1 29601 | ./navdump
It is also possible to feed NTRIP feed site data, including GNSS navigation data, to this data collection PC using RTKLIB’s command line application str2str.
str2str -in ntrip://rnav.info.hiroshima-cu.ac.jp/OEM7 | ./rtcmtool --station 254 --destination 192.168.0.1
If we use navparse, we could monitor the status with a web browser (port number 29599), but nothing was displayed on the browser in my environment. There was no response when I typed GET / HTML/1.0 on nc 192.168.0.1 29599.
OSNMA based on own observation data
I set the feed destination of the previous OSNMA reception experiment to my data collection PC, and ran galileo-osnma’s galmon-osnma.
nc 192.168.0.1 29601 | RUST_LOG=info cargo run --release OSNMA_PublicKey_20210920133026.pem
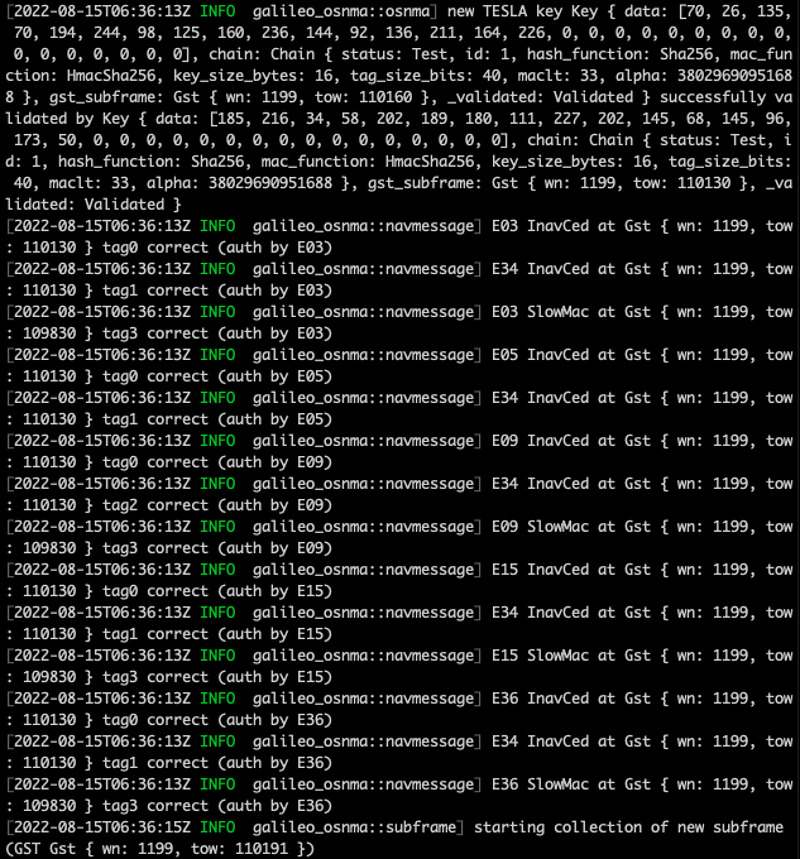
I was able to observe Galileo’s OSNMA with our own equipment!
This galmon is a very large piece of software, so it seems difficult for me to add the satellite system of QZSS (quasi-zenith satellite system). First of all, I would like to try to extract the SAR (search and rescue) field in Galileo’s navigation message I/NAV using galmon.
Conclusion
I tried Galileo’s navigation message authentication using the software, galileo-osnma and galmon, and the navigation satellite receiver u-blox ZED-F9P. Since I used data corrected from my own facility, I could observe for a long time without hesitation, which was convenient.